Saturday, December 31, 2011

Decimate Modifier

The Decimate modifier is essentially a very simple form of polygon reduction.  For this example, I'll start off with an icosphere.

First I'll make something that needs to be reduced, I'll add a Subsurf modifier and apply it.  Now we have a sphere with way more vertices than is needed.

So now, I'll add a Decimate modifier, and not that you can control how much of the mesh is reduced by the Ratio slider, and the Face Count shows how many faces are now remaining in the mesh.

Note that you will only be able to observe the changes from the Ratio slider when in Object View [TAB].

The reduced mesh is shown to be almost the same as the original, though not as uniform.

Arbaro Assets

The following is the list of Arbaro plants that are available (default meshes).

Barley

Black Tupelo

CA Black Oak

Desert Bush

Eastern Cottonwood

European Larch

Fan Palm

Lombardy Poplar

Palm

Quacking Aspen

Rush

Sassafras

Shave Grass

Tamarack

Weeping Willow

Wheat

Friday, December 30, 2011

Depth of Field

This entry will show how to get a Depth of Field (DOF) effect using the compositer in Blender.  To start off, we have a scene that has a bunch of thumbtacks, with one particular tack closest to the camera.

When rendered, this looks fine, however, considering the scale of these objects in real life, a normal camera would produce some very narrow depth of field to produce such a macro shot.

Arbaro

NOTE: consider using Sapling instead of Arboro.

Arbaro is a third-party developed app which has some basic plant life (bushes, trees, etc) that can be customized and exported as a Wavefront OBJ, which can be imported into Blender.

The program can be downloaded at http://sourceforge.net/projects/arbaro/

To run the program, you'll also need the Java development sdk: http://www.oracle.com/technetwork/java/javase/downloads/index.html

Once you download and unzip the arbaro zip file, follow the instructions in the readme to get it running.

I used the following commands to bring up the GUI:
     cd <arbaro directory>
     java -jar arbaro.jar -p pov/quaking_aspen.pov -o \
           pov/quaking_aspen.inc trees/quaking_aspen.xml 


When launched correctly the GUI should look like this.

You can browse through File > Open to see what other base objects are available.

To export a mesh, File > Export, and in the export window, set the Export Format to Wavefront OBJ and set the desired path.

Next, in Blender, do an Import and browse to the newly created OBJ file.

The mesh is high-poly, but looks really good.  This will help save time if you need some detailed plants in your scene.

Not Axis

When restricting access in transforms (scale, grab or rotate), typically the z,x and y keys are used to restrict access modification.  

You can also hit [Shift + x], [Shift + z] or [Shift + y]  to restrict to the other two axis.  Hence, if you scale and hit [Shift + z], the object will scale in the x and y axis, and not the z axis.

Thursday, December 29, 2011

Ocean Sim

This entry will show how to apply the new Ocean Modifier in Blender 2.6.1

To start off, you need a simple plane.

For that plane, add the Ocean modifier.

The plane will be scaled, and some default ocean deformation will be applied.

As a side not, if you want to animate the ocean, you can keyframe the Time attribute in the parameters.  For example.  Set the Time to zero and keyframe it at frame 1.  Then Set the time to say 10 secs, and keyframe that at frame 250.  When you play the animation [Alt+a], you can observe the ocean moving.

Otherwise, there are a host of other parameters that can be played with to modify how the waves will look, and how large the ocean is.

Once the ocean mesh is how you want it to look, choose the keyframe (in the animation) that is the desired wave pattern.

Next, add a Glass material to the mesh, and set the IOR to 1.33 (which is water).

Set your camera to a desired viewing position.

Next you need to add lighting to the scene to give it that out in the ocean look.  As an example, you can follow this entry Cylinder Lighting for the lighting below.

Since the original lighting is pretty drab, some simple compositing or post-processing in an image editor can give the image a little more life.

Cylinder Lighting

This is a nifty approach to creating simple environmental lighting using a cylinder and the Cycles render engine.  

First we start off with our HDR or sky image.  These can be downloaded from many sites online.  See the one of the Links entries for more information.

First create a cylinder (without ends capped) and wrap your scene with it.

Next, take a side view [NUM 1 or NUM 3] and, in edit mode [TAB], hit [u] for the UV menu and select Cylinder Projection.

Next, switch over to the UV Edit view [Ctrl + LEFT].

Select Clip to Bounds to automatically have the mesh fit the image box.

Because Cycles renderer does not support image assignment to UVs yet, switch to the Blender Renderer.

Now select the image from the beginning and load it into the UV map.

Adjust the mesh so that it fits the image.

Now the cylinder can use an emmissive image texture to create light for the scene.  You can follow this entry for that: Emmissive Image

Infinite Rendering

When previewing your mesh in the viewport for the Cycles renderer, set the Preview value to zero in the Integrator section of the Scene tab.

Fluid Simulation

This entry will walk through all the steps of setting up a realistic fluid simulation in Blender.  The steps are pretty basic, but there are a number of settings that need to be specified, and there is a lot of baking/rendering time.

To start off I have a very homely bowl which will 'receive' the fluid that will be input into the scene.  

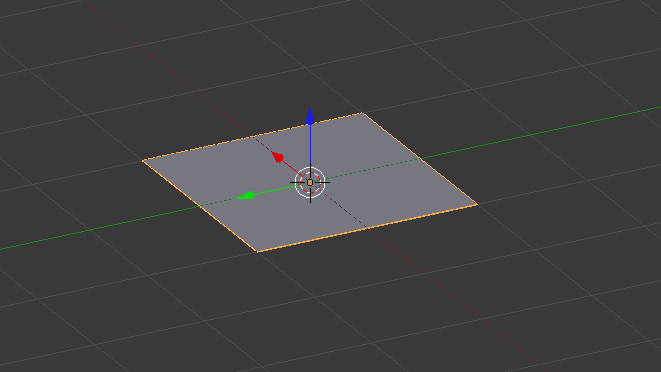
The first step to the fluid simulation is to define a Domain.  The typical domain is a simple mesh cube shown below.

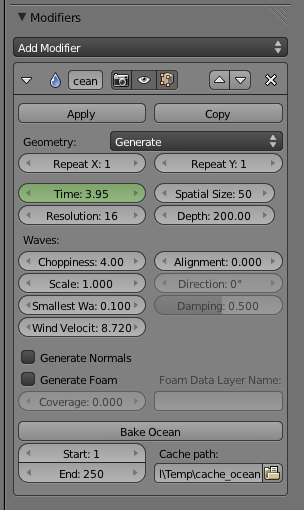
On the physics tab of the Cube, Enable Fluid, and set the Type to Domain.

Set the Resolution to be at least 150.

For the end time, you want it to match up with your timeline (25fps) in terms of seconds, or else your animation will be time shifted (sped up or slow motion).

Set the Subdivisions and Particle size for smaller particles when the water sprays.

Next, we need an object that will input the water into the scene.  For this we'll use a mesh sphere.

On the mesh sphere's physics tab, Enable Fluid and set the Type to Inflow.

The Inflow Velocity is used to designate direction of flow from the object.  In this example, the fluid should flow to the side (x-axis) and fall into the bowl.

Next select the bowl.

In the bowl's physics tab, Enable Fluid and set the Type to Obstacle.

Set the Volume Initialization to Both.

Finally, back on the Domain object (the cube), in its physics tab, click Bake, and wait a few hours for it to finish.  Bake times are determined by time of animation and the size of the domain box.

Once the bake is complete, the animation can be played [Alt+a] and the fluid can be seen animated.

At any given frame, the mesh can be rendered.  In this case I used the Cycles renderer.  I also smoothed the water mesh to make it look cleaner.  The actual render looks much better than the mesh in the viewport.