Showing posts with label Animation. Show all posts

Saturday, July 22, 2017

Texture Animation

This approach to animating textures is well documented via videos.  Here is a written procedure of the standard approach for using the UV Warp modifier to achieve a texture animation.

This technique is found in characters like Pocoyo or the Lego movies.


Saturday, December 17, 2016

Adding Multiple Animations

This post is targeted for storing multiple animations that can be brought into a gaming engine like Unity.  This post is built on top of 2 other previous posts.

To learn how to create a rig go here:  Rigging Intro

To learn how to animate a rig, go here:  Animate Rig

Building off these two the next step is to store several animations of the same armature in one blend file.  To do so, when you are in the Dope Sheet view and capturing your animation, you'll need to set the Mode to Action Editor.

Give the current animation a Name (in my case I called it "swim").  And be sure to click the [F] button, as this creates it as a unique animation in the file.


Click the [+] sign to create a new animation, and give it a new name.  You'll need to delete all the previous keyframes (except perhaps the first), then add new animation.  Once again, make sure to click the [F] button again so that it is identified as unique animation.

To see how to configure this animation in Unity, go here:  Import Animation Model

Thursday, June 13, 2013

Retargeting BVH

This entry covers another method for incorporating Motion Capture data through a BVH file.  This method is useful for any circumstance, but is exclusively helpful when your BVH rig does not have a nice T-Pose in Edit Mode (as shown below).


This entry is a very basic summary of what is shown in this video here Video Reference

A huge database of BVH files can be found here:  MoCap Database

If you have a BVH rig with a nice T-Pose while in Edit Mode, you may want to use this approach instead  BVH Meshing


Mesh a BVH Armature

This entry will show a simple approach to meshing a motion capture armature.  This method lends itself well to an armature that has a nice T-Pose while in Edit Mode.

For this approach, we'll be adding our own mesh to the existing mocap armature.  Since the requirement is have a nice T-Pose in Edit Mode, I found that BVH files at this site T-Posed Mo Cap Links, meet that requirement.

Below is an image of an example armature in edit mode.

Friday, April 26, 2013

Animate Object Visibility

There is a very simple way to key frame visibility of an object.  In the Outliner window, a keyframe can be set on the scene visibility or the render visibility simply by [Right-Clicking] on either the Eye icon, or the Camera icon.  


Monday, March 11, 2013

Cell Fracture

This entry will cover the basics of animating the fracture of an object.  This entry is based mostly on information from the following video:  Blender Cookie Tutorial

The first step is to find and enable the Cell Fracture add-on in the User Preferences.

Friday, November 16, 2012

Instance Along Curve

This entry covers the concept of duplicating a mesh (cube in this example) along the path of a curve.  This is a very useful animation ability when trying to grow a curvey line or path.  

To start off you'll need at add [SHIFT+A] a curve and a mesh (cube).  It is worth noting that the direction of the curve matters for this example.  To have the cube follow the path of the curve directly, you'll want to situate it at the beginning (curve arrows are pointing away from cube) of the curve.

Saturday, June 16, 2012

Build Modifier

This quick entry demonstrates the Build Modifier.  It is very simple and has a neat animation effect.  When added, you'll first notice that your mesh disappears.  This is because all the vertices are hidden, and will be sequentially revealed when the animation is played [ALT + A].

In the properties panel, there are a few controls.  The Start and Length are used to control the timing and length of the animation, and the Randomize allows the sequence of vertices to appear randomly.  

To demonstrate this neat effect, I downloaded a motorcycle from Blend Swap, combined all the separate parts into a single mesh by joining [CTRL+J], and added this modifier.  Since I didn't use the Randomize function, the mesh built in a semi-ordered path, and so I tried to follow that path with the camera.

Wednesday, June 13, 2012

Curve Path

This entry will cover the use of a Curve called a Path, which can be used to guide an object to follow along its path.  A very obvious application for this is to create a roller coaster, which we will do for this example.

First add [SHIFT+A] a Path through the add Curve menu.  In Edit Mode [TAB], you can manipulate the curve by moving the control handles and extruding [E] points as necessary.  A vague idea of the shape of my coaster can be seen in the image below.

Next is the process of adding an object to follow the curve.  In this case I'll be using the Camera so that I can view a first person perspective of riding along the path.  Joining the two is done by parenting the object (i.e. Camera) to the curve, selecting both and [CTRL+P], and selecting Follow Path.

The time of the animation created by this can be controlled in the curve properties panel on the Path itself.  By default the animation length is 100 frames.

Note that the point at which the following object (camera) is attached to the curve will be based on the animation frame that is selected.  If frame 1 is selected, that will be connection reference point for the camera.

For fun, I created another curve in the shape of a slice of the track to give the track a physical presence.  The curve can be seen highlighted in the image below.

To apply it to the curve, select it in the Bevel Object box of the Geometry section in the Curve properties.

Finally, adding some support poles and a base floor, the track is complete, and the animation of the roller coaster can be run.  Note at certain curve points, the orientation of the following object may rotate, and so correction may be necessary with keyframes [I] on the following object.

Video of the roller coaster animation.

Friday, June 1, 2012

MDD Import/Export

This entry covers the use of the MDD export/import plugin to simplify control of developed animations.  This format essentially takes the all the animation aspects of the mesh, whether generated by transforms or by lattices, and embeds it within the mesh as a sequence of shape keys.  

This can be very useful for performing sequences, or just handling the animation as a part of the mesh.

To start out, I have a simple animation of a cube that involves translation, scale and rotation.  Ultimately I'd like to make a sequence of cubes perform this animation with time-offsets.
The very first step is to add or enable the MDD plugin in the User Preferences menu under AddOns.

Next, once the animation is complete, make a copy of the mesh [SHIFT+D] and move it to another layer.  Also, remove all animation or influences (modifiers) that cause animation on the mesh.

Next select the original mesh that has all the modifiers and animation still connected to it and export as an MDD file format.  This is the equivalent of saving the Geometry Cache File, or Point Cache File.

Be sure to set the export parameters according to your animation, specifically noting Frames Per Second and the End Frame.

Once the MDD is saved, back in viewport switch to the layer with the duplicate (with all animation effects removed).  Now go to File>Import and import the MDD just saved.

You should now observe both in the timeline and the timeline and in the object Vertex panel that there are a set of Shape Keys for every frame attached to the mesh.  The animation will be available in full, but the orientation will be incorrect.

The first step to correction is to select the Basis key (the first one) and uncheck Relative, and then select all the vertices in the object in Edit Mode, and rotate those vertices collectively 90 degrees in the x-axis.  (this is a correction for Y vs Z being the up axis.)

Once this is done, you can re-check the Relative box in the Shape Keys view.

A final Scale of -1 may also be necessary pending on the animation.

Once the orientation is set correctly, the control of the timing of the animation can be manipulated in the NLA Editor, and the mesh can be duplicated as many times as desired while maintaining its animation.

Thursday, May 31, 2012

Dope Sheet

This is an intro to the Dope Sheet.  Although it can be brought up in any view, the Dope Sheet is commonly found in the Animation view [CTRL+LEFT].

This view plays a key role in editing animations. From my observations and uses of it, the primary functions of the view include:

  • Deleting Keyframes [X]
  • Moving Keyframes [G]
This tool can be worked with in conjunction with the Graph Editor for complete control of animations.

Curl Animation

This entry shows how to perform a mesh curling animation using a Lattice. In this example we will simply be curling a Grid which will be referred to in the scene as Paper.

In the starting scene we have a number of items, the Paper, the Lattice and an Empty (Lattice Origin).  The Paper is going to be deformed, and the Lattice will be used to do the deforming, but the Empty is a little more obscure.  The Empty has two functions.  First it is set as the Parent of the Lattice, to control the orientation of the bending (when we get there).  Second, the Empty acts as the origin from which the bending begins.


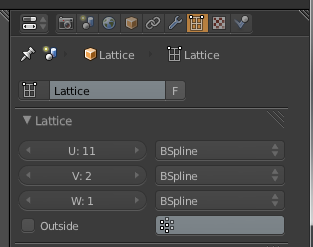
To set this up, on the Lattice change its settings to match the mesh, giving it a flat height, only two lengths but several widths for the deformation of the curling.

Next on the Paper, apply the Lattice Modifier and set the Object to the Lattice so that it can be affected by the Lattice.

Finally back on the Lattice, add a SimpleDeform Modifier, and set the type to Bend.  You'll notice that on first application, the Bend with neither be in the desired direction for curling, nor will it start the bend at the Empty.  This is where assigning the Empty to the Origin field and checking Relative will help.  Also turning the empty 90 degrees will turn the bend into the right direction.

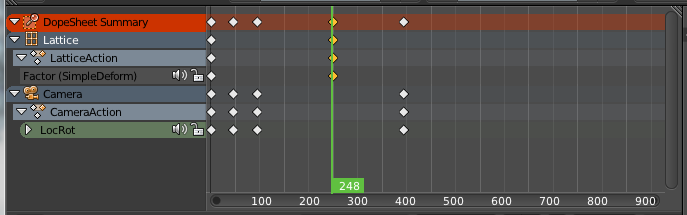
At this point, all that's left is to Keyframe [I] the Deform>Factor by holding the mouse over the field and hitting [I], and you can create the following animation:


Monday, May 7, 2012

Animation Blur

This entry covers the function of adding blur to animations.  This can be done by enabling the Sampled Motion Blur box in the Render tab.  There are two parameters that can be adjusted, Motion Samples increases the fidelity of the blur, while Shutter determines the length of the streak as it pertains to a camera shutter speed.

The use of this can add realism to your movie as most cinema is not recorded in high-speed shutter, so some blur occurs.  A comparison of a single frame of no blur versus blur shows the obvious difference, though in motion it's subtle.  The first image shows a transition of words without blur.

This image shows the same exact motion but with blur turned on.

The full video without blur:

The full video with blur:

Thursday, March 22, 2012

The Grease Pencil

The Grease Pencil is a very simple tool in Blender that has many useful applications.  In its simplest form, it just provides the ability to draw in the 3D View.  However, this can be useful for explaining, storyboarding, quick animating, etc.  

We'll go through some of the features and some of these applications.

The Grease Pencil is always available in the Tools [T] menu on the left side of the 3D View.  To begin drawing at any point, any of the four modes: Draw, Line, Poly and Erase can be selected.  This will allow you to make one stroke.  If Use Sketching Session is selected, then a new layer will be created and you can make many strokes.

The commands for these modes are:

  • Draw: D + LMB
  • Line: Ctrl + D + LMB
  • Poly: Ctrl + D + RMB
  • Erase: D + RMB
  • Exit: Esc


In the Properties Panel [N], to the right of the 3D View, are more parameters that can be adjusted.  When you select Use Sketching Session, a new layer is created.  In this case, it is called GP_Layer by default.

In the panel above, note that there are four different Drawing Settings.  These each affect the scene differently as will be shown below.  Four different marks were made, each with a different drawing setting.

Note that when the scene is moved, their characteristics are revealed.

  • Cursor/Stroke:  Draws within the scene, but not on meshes.
  • Surface:  Projected onto mesh in the scene (does not move with mesh though)
  • View:  Static in the 3D view

Note that X-Ray is turned off so that's why you can't see the lines through the mesh.

Finally, another common method for employing the Grease Pencil is to sketch out a simple animation.  The drawings created are all tied to specific frames.  So each frame can have its own drawing.  These can be animated if the timeline is played.  As well, to facilitate animating, the Onion Skinning option is available in the Properties Panel, which, as shown below, allows you to see lighter traces of the previous frames (also designated in the panel).

Wednesday, February 29, 2012

Lattice Modifier

The Lattice Modifier is a unique kind of mesh deformation modifier, but with a special twist.  The modifier is not applied to the mesh, but affects the mesh as it interacts with the modifier.  The benefit of this is a non-permanent mesh deformation, which has some unique applications with animation.

So we'll start out first adding [Shift + A] a Lattice.

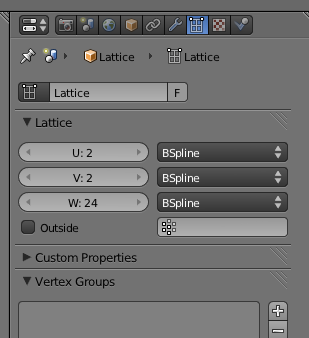
The resolution, or number of controllable vertices available in the lattice can be adjusted by increasing the U, V and W fields in the Lattice panel.

In Edit Mode for the Lattice, the vertices can be adjusted exactly the same way that meshes can be adjusted using the standard transformations.  In this example we'll be creating an hour-glass type shape using this lattice and a cylinder.

Now in adding the Cylinder, note that the cylinder needs many segments if the deformation is to be smooth and clean.  I used several ring cuts [Ctrl + R] in this cylinder and even add a Subsurf [Ctrl + 2] to keep the column smooth.  Note also, that although the cylinder doesn't have to be in the lattice for it to be effected, it must be along the primary axis (X,Y,Z) to be affected.

On the Cylinder object, add the Lattice modifier and for the Object, select the lattice we created earlier.

You will see right away that the cylinder is now deformed by the lattice and mimics its shape.  Although its less likely that you will use a lattice for this purpose, it serves a more practical purpose in animation.

In the example below, both the glass and the blue ball meshes have the same Lattice modifier, so you'll notice how the ball is affected by the lattice differently as it passes through, but in all cases it follows the shape of the lattice, delivering the illusion of a thick ball passing through a small hour-glass hole.

Tuesday, February 28, 2012

Shape Keys

This entry will show how to apply Shape Keys.  This capability is most commonly applied to face manipulations to animate expression and talking for characters, but essentially it can be used whenever mesh deformation states make up the define the nature of the animation.  No rigging is necessary for this.

Note that shape keys can also be applied to Curves even though it isn't shown here.

So to start, we will use the monkey and animate its face using shape keys.

With the Monkey selected and in Object Mode, go to the Object/Mesh pallet, and in the Shape Keys section, click the plus button.  The first item displayed should be called Basis.  Click the plus button again, and this should create a second entry.  Select this entry, and now you can name this entry whatever you like, then move to the model.

In Edit Mode [TAB], you can now edit the mesh to capture this Shape Key state.  Note that since the normal shape is captured in the Basis key, anything done here will only be applied to the new key.  When you are done return to Object Mode [TAB].  Add as many Shape Keys as you like repeating this process.

To create shape key - keyframe, select the one of the shapekey elements in the pallete view and adjust the value (0 to 1.0) and press [i] and this will capture the value for that animation frame.

Next switch to the Animation View [Ctrl + LEFT].

Change the DopeSheet view to show the ShapeKey Editor.

In this view, you can animate between the Shape Keys by simply selecting a point on the timeline, and adjusting the scale amount (green numbered box) for each Shape Key.  In this way, you can combine Shape Keys and combine them in unique ways.

The final animation for this example can be viewed below:

Monday, February 27, 2012

Render Video

This entry takes from Blender Guru's quick tip on rendering videos.  For the full video click here:

This entry focuses just on compositing the rendered images into a quicktime video using the Video Sequencer in Blender.  So the first step assumes that the images have already been captured (doesn't have to be Blender images, can be any jpgs or pngs).

The first step is to switch to the Video Editor view [Ctrl + LEFT].


In this view, select Add then Image.

In the dialog box select all the images related to the video sequence [A] then select Add Image Strip.

At this point the image strip should be available in the timeline.  You may have to move the image sequence so that it starts at frame 1 or 0. Set the ending time of the animation to be the same as the last frame in the image sequence.

Now back in the standard view, you can adjust the animation render properties (as below) and render a new animation.  These settings will publish a quicktime .MOV.

Monday, December 26, 2011

FPS

Just a quick note that the frames-per-second (FPS) in blender animation is 25.

Hence the default timeline is 250 frames, or 10 seconds.

Wednesday, December 14, 2011

Animate Rig

This quick tutorial will show how to animate a rig.  Before following these steps, first create a mesh and apply a bone rigging to it.  Once this is complete and done correctly, you can begin animating.

The first step is to switch into Pose Mode.  In this mode you can select bones, pose them, and keyframe [i] as usual.  For the very first frame, keyframe as LocRot.  Also make sure to select-all-bones every time you key frame.

For all other keyframes, use Available.

Note:  If you mess up, you can always move back to a previous keyframe and use Available to override it.