This post focuses on using the 3D Printing Addon to calculate the surface area of a mesh. This can translate into useful information, as in the case when designing a backyard, and you want to determine the surface area of a patch of grass that is not nicely geometric.
Showing posts with label AddOn. Show all posts
Saturday, February 28, 2015
Saturday, June 22, 2013
Ivy Generator
This entry is an introduction to the Ivy Generator addon. This addon is now built into the latest version (at least versions later than 2.66a). To demonstrate this function we'll be adding the ivy vines to this marble platform of suzanne.
Thursday, June 13, 2013
Retargeting BVH
This entry covers another method for incorporating Motion Capture data through a BVH file. This method is useful for any circumstance, but is exclusively helpful when your BVH rig does not have a nice T-Pose in Edit Mode (as shown below).
This entry is a very basic summary of what is shown in this video here Video Reference
A huge database of BVH files can be found here: MoCap Database
If you have a BVH rig with a nice T-Pose while in Edit Mode, you may want to use this approach instead BVH Meshing
This entry is a very basic summary of what is shown in this video here Video Reference
A huge database of BVH files can be found here: MoCap Database
If you have a BVH rig with a nice T-Pose while in Edit Mode, you may want to use this approach instead BVH Meshing
Saturday, November 10, 2012
Copying Attributes
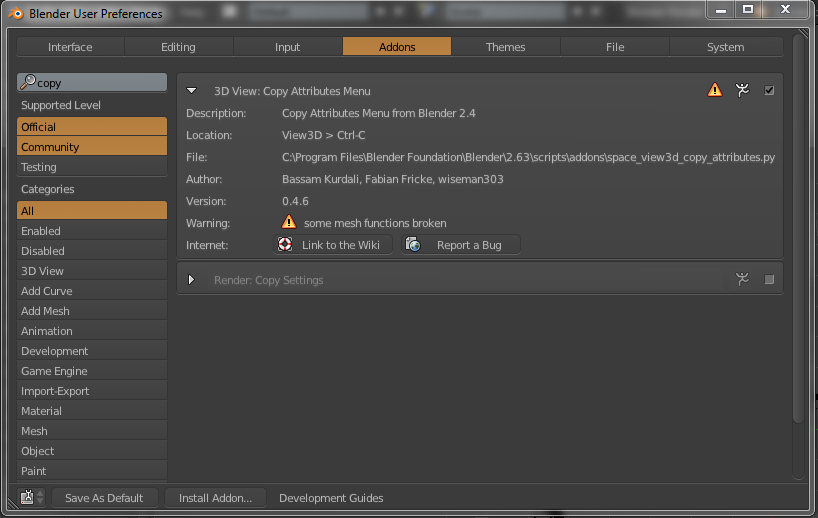
This quick entry covers the Copy Attributes Add-On. This simple add-on allows you to take the transform (and many other attributes) of an object, and apply it to another object. So first, enable the add-on through the user preferences menu.
Friday, June 1, 2012
MDD Import/Export
This entry covers the use of the MDD export/import plugin to simplify control of developed animations. This format essentially takes the all the animation aspects of the mesh, whether generated by transforms or by lattices, and embeds it within the mesh as a sequence of shape keys.
This can be very useful for performing sequences, or just handling the animation as a part of the mesh.
To start out, I have a simple animation of a cube that involves translation, scale and rotation. Ultimately I'd like to make a sequence of cubes perform this animation with time-offsets.
The very first step is to add or enable the MDD plugin in the User Preferences menu under AddOns.
Next select the original mesh that has all the modifiers and animation still connected to it and export as an MDD file format. This is the equivalent of saving the Geometry Cache File, or Point Cache File.
Be sure to set the export parameters according to your animation, specifically noting Frames Per Second and the End Frame.
Once the MDD is saved, back in viewport switch to the layer with the duplicate (with all animation effects removed). Now go to File>Import and import the MDD just saved.
You should now observe both in the timeline and the timeline and in the object Vertex panel that there are a set of Shape Keys for every frame attached to the mesh. The animation will be available in full, but the orientation will be incorrect.
The first step to correction is to select the Basis key (the first one) and uncheck Relative, and then select all the vertices in the object in Edit Mode, and rotate those vertices collectively 90 degrees in the x-axis. (this is a correction for Y vs Z being the up axis.)
Once this is done, you can re-check the Relative box in the Shape Keys view.
A final Scale of -1 may also be necessary pending on the animation.
Once the orientation is set correctly, the control of the timing of the animation can be manipulated in the NLA Editor, and the mesh can be duplicated as many times as desired while maintaining its animation.
Thursday, March 22, 2012
Loop Tools - Bridge
Update Version 2.63
The capability of edge loop connecting is now built-in to Blender in version 2.63. The feature can be accessed through the specials menu [W] and select Bridge Two Edge Loops. The approach is the same before, however the built-in one doesn't have the fancy features of twisting and adding segments.
Older than Version 2.63
This entry covers a vast Add-On called Loop Tools, and specifically the Bridge capability.. This has been built-in for quite a few versions now and so can easily be enabled in the User Preferences > Addons. There are very many mesh tools in this Add-On, but we'll be focusing on the Bridge capability for this entry.
For this example we have a set of curved pipes created using some curves and a Mirror Modifier. It is worth nothing that the holes are perfectly aligned with each other due to the mirror, and now we'd like to connect them, but not have to select individual vertex pairs and fill [F].
A much faster and cleaner method is to select the two rings to be connected and use the Bridge tool.
Looking at the parameters in the Tools [T] menu, there are a number of settings that can be applied.
The simplest approach in this case is to connect the two loops with a single segment, by setting the parameters and clicking the Bridge button.
Further examples show setting 10 segments to give the mesh more definition (potentially for further manipulation).
Apparently you can also apply a Twist to the bridge giving way to a twisted mesh for a handle.
Thursday, January 12, 2012
Sapling
This is a quick summary of the tutorial posted here: Sapling Tutorial that details how to generate trees using the internal add-on Sapling.
So first enable the add-on. If it's not available in your menu, you'll need a newer version of Blender.
Once the add-on is enabled, you can add a Tree in the Curve menu.
At first the tree won't look like much, so make these initial setting changes in the tool-panel [T] (on the left).
Now we have something that looks like a tree.
Note that there are numerous settings in the Sapling add-on by which you can tailor your tree. Only the basic major settings will be covered here.
To generate a new tier of branches increase the Level.
To move the branches up and down the trunk, adjust the Base Size.
New tree with Level 3 branches and lower base.
Next, adjust the Vertical Attraction to give it a perky, or willow like feel.
Notice with a negative Vertical Attraction, the branches hang down.
Finally, show the leaves. Rectangular leaves use less computing power. You'll want to use textures to define the leave shape anyway.
Fully developed tree.
Note that the tree is composed of a curve which is the trunk, and a mesh which represents the leaves.
This allows for easy texturing of each component individually.
A simple render of a brown trunk, and green leaves.
Wednesday, December 21, 2011
Clay Rendering
At times it will necessary (or just cool) to see the scene rendered without textures or materials. If you are really good at faking reality, some will ask for a "clay render" to verify that your image isn't a photograph -- that's when you know you are good.
So instead of having to create a new blank material and manually apply it to every object in your scene, there is an AddOn which will do it for you.
This AddOn can be found here: ClayRender.py
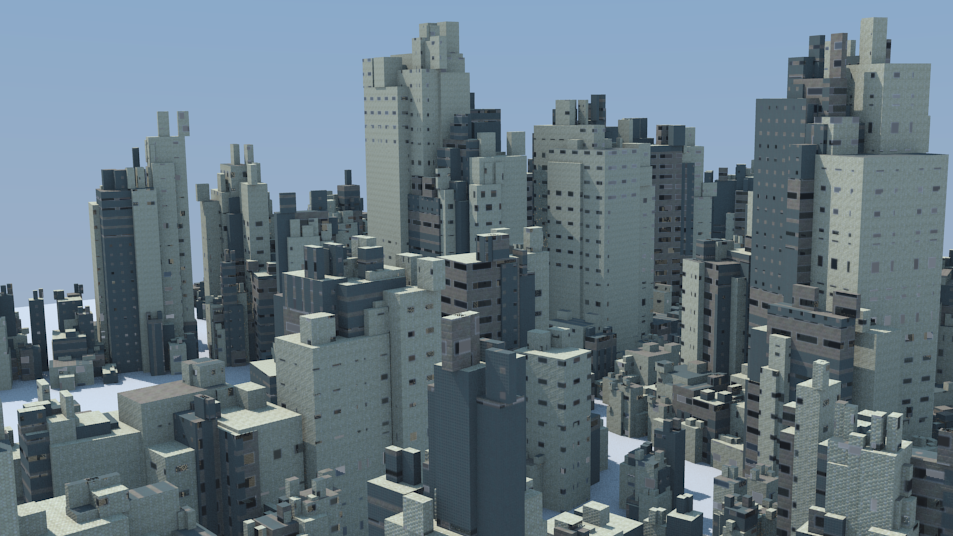
To demonstrate how simple and effective it is, I'll start with a city scene that is already textured (generated by Suicidator City Generator).
After the AddOn is installed and enabled through the User Preferences menu, on the Camera tab there is now a new section under Render where you can enable Clay Render.
Enabling Clay Render and re-rendering will give the following perfectly non-textured image.
City Generator
This tutorial walks through the initial steps of adding the Suicidator City Generator. This add-on is very nice to have to make low-detail cityscapes.
First, download the AddOn from here: http://arnaud.ile.nc/sce/home
Unzip the package and copy the entire (uzipped) folder to your Blender AddOns directory, something like: C:\Program Files\Blender Foundation\Blender\2.60\scripts\addons
Inside Blender, find the AddOn within the User Preferences menu, and enable it.
Once the AddOn is enabled, you'll notice in the toolbar a set of options specific to the Suicidator program. When you click BUILD CITY, a mesh city is created for you in the 3D view. The free version has some limits, but its still very nice, and will save countless hours.
A quick render of the city, with textures already added by the tool.
First, download the AddOn from here: http://arnaud.ile.nc/sce/home
Unzip the package and copy the entire (uzipped) folder to your Blender AddOns directory, something like: C:\Program Files\Blender Foundation\Blender\2.60\scripts\addons
Inside Blender, find the AddOn within the User Preferences menu, and enable it.
Once the AddOn is enabled, you'll notice in the toolbar a set of options specific to the Suicidator program. When you click BUILD CITY, a mesh city is created for you in the 3D view. The free version has some limits, but its still very nice, and will save countless hours.
A quick render of the city, with textures already added by the tool.
Wednesday, December 14, 2011
Bevel Weight
This tutorial will walk through the process of applying bevels to specific edges of a mesh, and adjusting those bevels real-time.
Version 2.63
In version 2.63, beveled edges is a native function under the specials [W] menu. Simply select the edge(s) and apply the Bevel.
The effect is simple as expected.
The strength of the Beveled edge can be controlled in the tools [T] menu once the bevel is created. Adjust the Percentage to adjust the strength of the bevel.
Also, one trick I discovered is that, since recursion isn't available in this version, you can approximate rounded edges by performing successive Bevels keeping all the previous new edges selected and adjusting the percentage to even them out.
Older than 2.63
First get the Edge Tools add-on which can be found here: Edge Tools Addon.
Install this addon through the User Preferences and enable it.
Apply a Bevel Modifier to the object. Normally this just applies a standard bevel to every edge of the object. However, to bevel only specific edges, more steps are required. Select Weight for the Limit Method.
Next, in edit mode of the object, select only the desired edges to be beveled. Bring up the generic search menu [spacebar], and search for Set Bevel Weight. Select that option.
Another dialog comes up asking for weight. Just set it 1.0. The actual adjustment of the bevel will be performed in the modifier. Make sure the OK button is clicked. If the dialog box disappears before you click OK, then the weight will not be applied.
At this point the bevel is applied, and its thickness can be adjust by the width parameter in the modifier.
Tuesday, December 13, 2011
Face Inset Fillet
This is another Add-on from the the CAD set found at the following forum: Blender CAD AddOns
This is the Face Inset Fillet, which essentially creates filleted corners where edges meet. In this example, I started with a square face, and applied the add-on. The operation removes the original face, and applies the border with the fillited corners.
For this example I figure it looked a lot like a slide film (for photo).
This is the Face Inset Fillet, which essentially creates filleted corners where edges meet. In this example, I started with a square face, and applied the add-on. The operation removes the original face, and applies the border with the fillited corners.
For this example I figure it looked a lot like a slide film (for photo).
Lathe
This is another add-on from the CAD set that is found in this forum: Blender CAD AddOns
This add-on in particular is called the Lathe, and although it is basically the same capability as the Spin capability, it gives a little more capability in that you can adjust its parameters in real-time and see the changes, rather than trying to set it and click Spin every time.
Screenshot of the Lathe controls. You'll notice that you can view the object from any view, but change the axis of rotation to any of the standard cartesian axis (which spin can only rotate along the camera view).
Monday, December 12, 2011
Cloud Generator
This entry will show how to use the Cloud Generator, which is a built-in add-on within Blender. It is very easy to use, and the results are quite fantastic for such little effort.
So first, enable the add-on within the User Preferences.
Next add a mesh. A UV sphere works as a good first example. Upon selecting the object, you should see the Cloud Generator controls in the left (tool) panel. Select Generate Cloud.
This will cause the 3D view to show the following. Many objects are created in the process of generating the cloud. Though it's not much to look at now, the render is very good.
Render of a simple sphere based cloud. Even with the standard blender lighting, it has some very good detail and realistic effects.
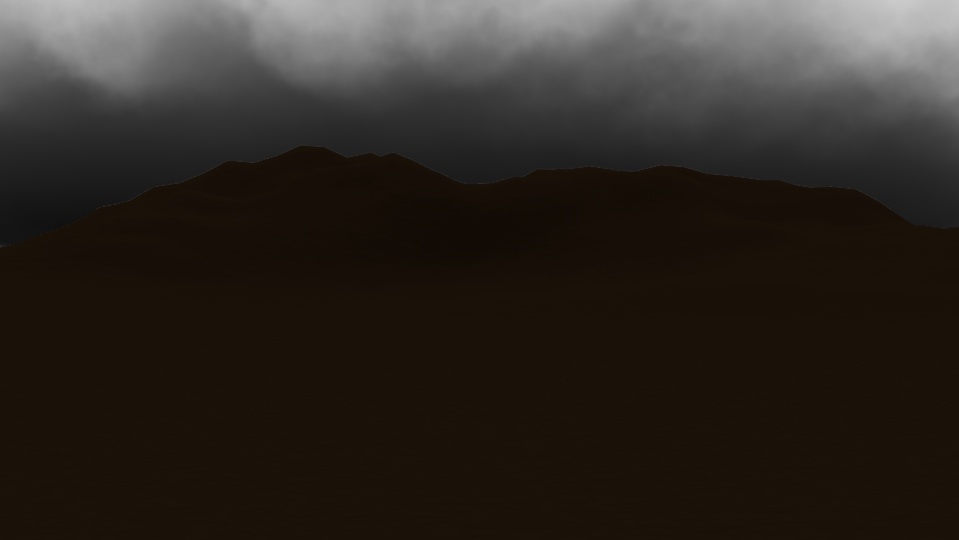
To take it one step further, I created a desert scene with a very thick overcast sky (made with the cloud generator).
Note the view from the camera. The cloud is very large by comparison to the ground objects, so as to fill the sky. The mountain range was created using the ANT Landscape add-on.
The render of the overcast desert scene. The clouds are probably the best looking part.
Subscribe to:
Posts (Atom)