Edge Loops
The first and most important edge tool is the adding edge loops [CTRL + R]. This is the primary method of adding vertex detail while maintaining quads in your topology.
An edge loop can also easily be selected by [ALT + RightClick] an edge in the loop.
An edge loop can be easily deleted by selecting the loop and pressing [X] then selecting Delete Edge Loop.

An edge lop can be easily moved along its edges using the Edge Slide function.

Edge Creases
When using the Subsurf Modifier, it is common to use extra ring-loops to tighten up the corners. A better method which does not require more vertices is to select the edges desired to be tightened and to adjust the Mean Crease found in the properties bar [N]. This is the same function as the Edge Crease in the edge menu. Mean creased edges are identifiable on the mesh with a magenta color.

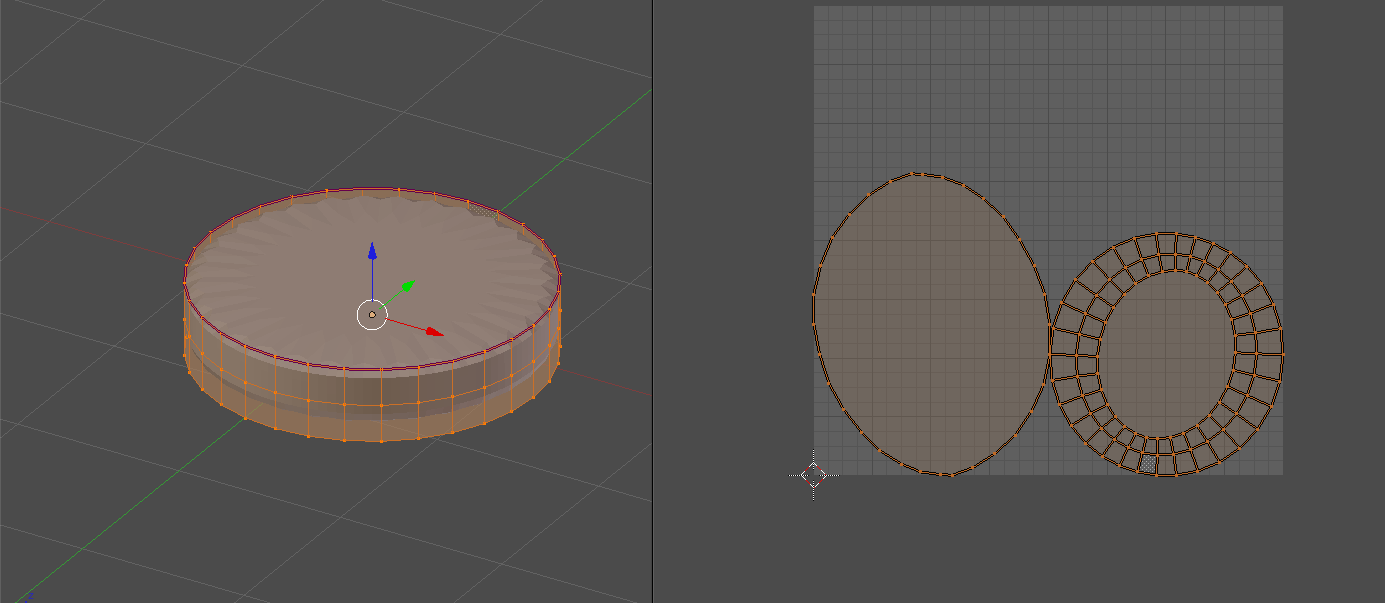
Marking Seams
The function of marking seams in your mesh is to isolate particular faces for UV unwrapping. In the example
I marked the top circular edge of the cylinder, so that when I UV unwrapped it, it's its own island in the UV map. UV marks are highlighted as magenta colored edges (which is ambiguous with the mean creased edges).

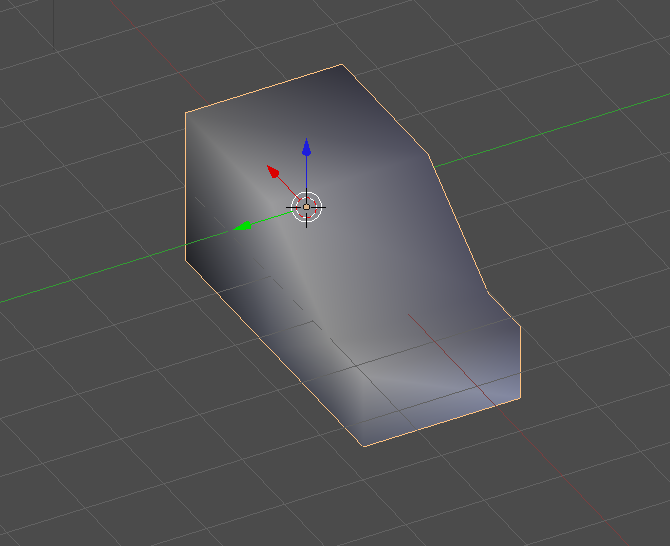
Marking Sharps
The function of marking sharps is the same as marking seams, except that the purpose for marking sharps is to give you more control of a smooth shaded surface. For example, this simple extruded box shape is smooth shaded, and has the typical weird shadowing (as would be expected).
This weird shading can be mitigated by applying an Edge Split Modifier, which essentially, breaks apart the faces so they are separate (meaning duplicated vertices), so the vertex-normal-interpolation that is performed is isolate to the normal of the face to which it is attached (still with me?). Empirically, this just makes all the edges sharp again (and the faces look flat).
The modifier gives you some control in the form of the Split Angle, but in some cases that is not enough control. In some cases you may want to specify which edges/faces exactly that you want excluded from the rest of the smooth calculation.

This is where Mark Sharp comes in. It works in tandem with the Edge Split Modifier. For all faces (or set of edges creating faces) selected, when you apply Mark Sharp, the Edge Split modifier automatically assumes it to be split rather than relying on the split angle test for the edge.

In this example I marked the sides as sharp, so the side faces now look nice and crisp and flat, and the top faces are still smoothed together.

This same function can be achieved without the Edge Split Modifier by simply selecting the faces and choosing Edge Split in the edge menu.
Bevel (Reference)
Info on this can be found here: Bevel
Bridge Two Edge Loops (Reference)
Info on this can be found here: Bridge
No comments:
Post a Comment