One of the primary keys to effective sculpting is ensuring there are enough vertices or poly faces to provide accurate distortion. In this case, we are taking an already high poly sphere and Applying a Sub-Surf modifier. This will multiply the number of available faces on the sphere.
After applying the modifier, the same modifier is set again, but not applied.
Switch to Sculpt Mode at this point using the mode window.
Notice the sculpting controls in the tools panel. This is a simple matter of either adding (raising) the mesh, or subtracting (lowering) the mesh where is painted.
An example of add painting of the sphere. Looks almost like the sphere has veins or some tentacled alien has taken it captive.
An example of the subtract painting which makes the sphere look dimpled or grossly imploded.
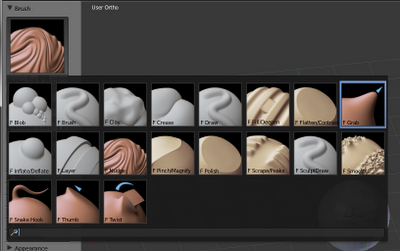
Not also that by clicking on the icon in the upper left of the tools panel, you can see that there are many different kinds of brushes which will have varying effects on the vertices as you are painting.
There is much more that can be done with Sculpting, but this the basic approach.


No comments:
Post a Comment