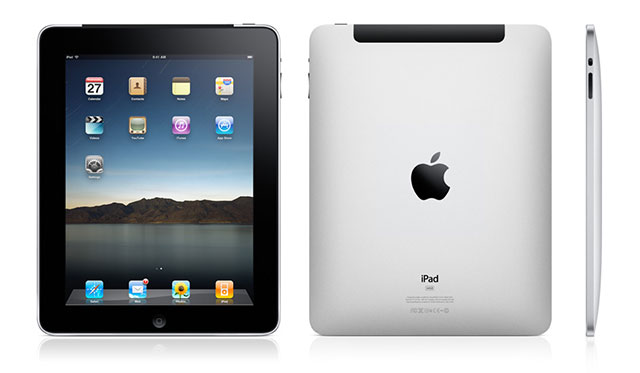
When modeling an object that already exists, it is very helpful to have reference images. A reference image like the one below for an Ipad is ideal because it gives multiple orthographic views of the object from different sides of the object.
This entry will show how to use an image such as this as an aid for modeling.
In the properties panel [n], near the bottom is section for Background Images. Select it, and click the Add Image button. By default the image will be available in all standard numpad views (left, up, front, etc). The catch is, the view must be orthographic [NUM 5]. Having a single background image shared for all axis is fine for a single view reference, but often times you'll need to have your mesh aligned (in this case) to different parts of the image.
To have independent views for each axis, simply set the Axis field to the desired view. In this example, I created two background images (using the same file above), and set one to the Right view and one to the Front.
Use the X and Y sliders at the bottom of the panel to adjust the location of the background image so it's aligned with the mesh. It is preferred to move the image rather than the mesh.

For the right axis view, notice how how the image is aligned so the mesh fits right over the side view.
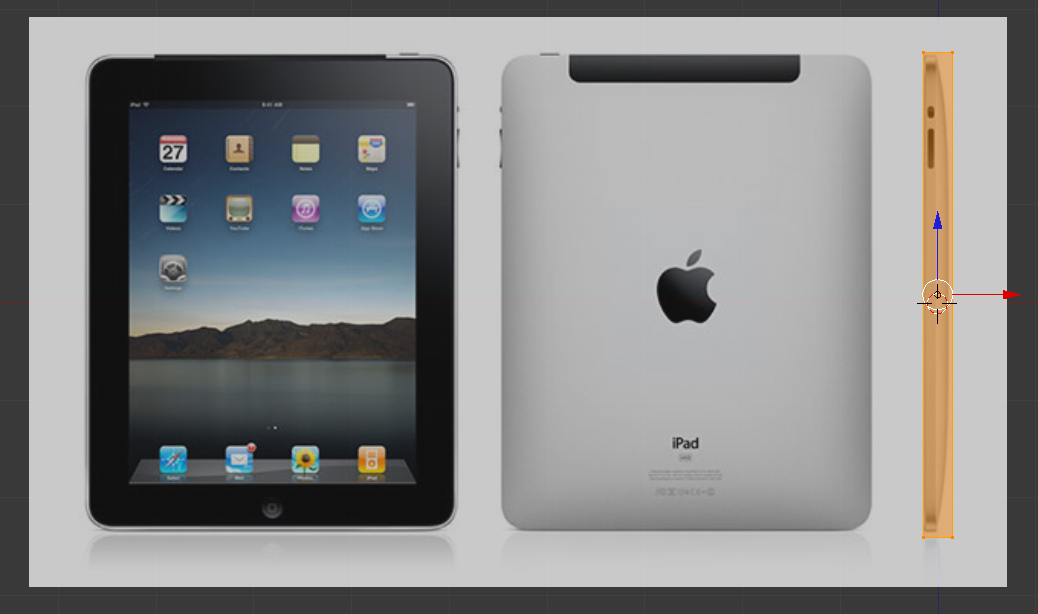
For the front axis, notice how the front part of the ipad is aligned with the front of the mesh.

By using the image, the dimensions of the ipad are now correct and applied to the mesh, even without measuring.
Anytime you view the mesh from a view that is not orthographic, or is not one of the primary axis views, the background image will be hidden. As well, the image will not be rendered.

No comments:
Post a Comment