Thursday, January 12, 2012

Sapling

This is a quick summary of the tutorial posted here: Sapling Tutorial that details how to generate trees using the internal add-on Sapling.

So first enable the add-on.  If it's not available in your menu, you'll need a newer version of Blender.

Once the add-on is enabled, you can add a Tree in the Curve menu.

At first the tree won't look like much, so make these initial setting changes in the tool-panel [T] (on the left).

Now we have something that looks like a tree.

Note that there are numerous settings in the Sapling add-on by which you can tailor your tree.  Only the basic major settings will be covered here.

To generate a new tier of branches increase the Level.
To move the branches up and down the trunk, adjust the Base Size.

New tree with Level 3 branches and lower base.

Next, adjust the Vertical Attraction to give it a perky, or willow like feel.

Notice with a negative Vertical Attraction, the branches hang down.

Finally, show the leaves.  Rectangular leaves use less computing power.  You'll want to use textures to define the leave shape anyway.

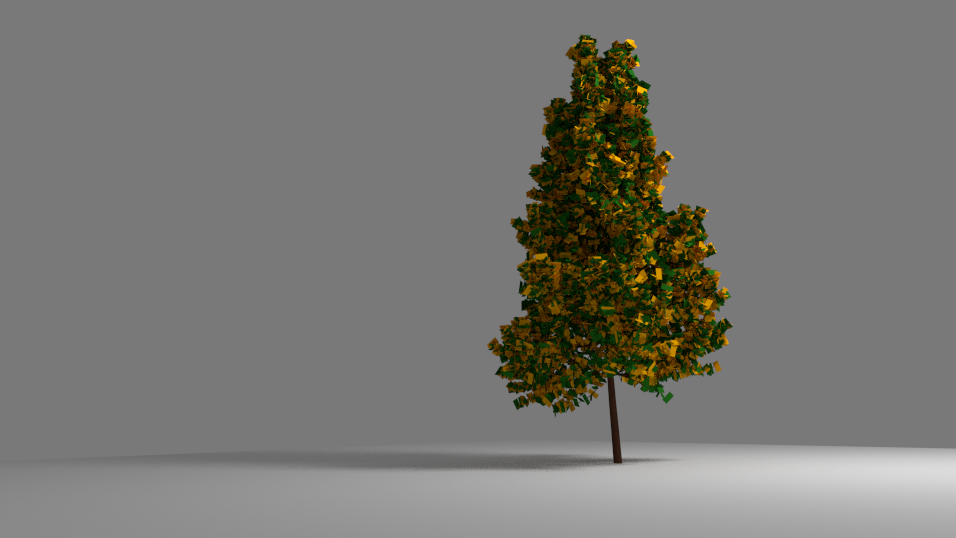
Fully developed tree.

Note that the tree is composed of a curve which is the trunk, and a mesh which represents the leaves.
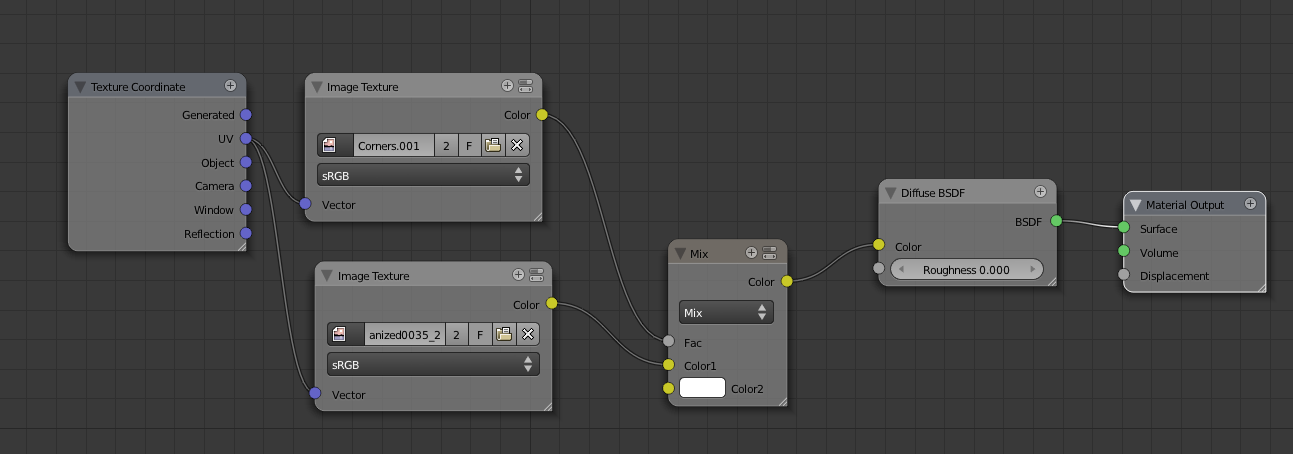
This allows for easy texturing of each component individually.

A simple render of a brown trunk, and green leaves.

Random Select

This is a rather simple concept, but it was enough of a "ah-ha" moment for me that I decided to give it its own post.  If you have a mesh with many faces (or verts or edges) and you want to randomly select them, this is how.

For this example we'll start with a sapling tree.

To randomly select different leaves (faces) on the tree, while in Edit Mode [TAB], under Select, choose Random.  (Note that there are many other options here).

As expected, this will randomly select faces within the mesh (tree).

From here I can assign separate colors (materials) to the randomly selected leaves to generate a autumn colored tree.

Saturday, January 7, 2012

Texture Displacement

Texture Displacement in Cycles is essentially what was normal-map-texturing in the internal renderer.  This entry will show how to apply texture displacement to a mesh, and I'll show this with a log I created for my fantasy football team.

What we want to add bump mapping to is the text "Motown Mayhem".  Since this mesh will have a galvinized metal texture, I expect it would have rough texture as well.


The basic idea of adding displacement is feeding the image into the Displacement input of the Material Out box.  In this case however, to control its strength, we add a Math node in between and set it to Multiply.  By adjusting the value slider, you can adjust the strength (depth) of the bump.

The final render of the logo with the bumpy text.

Texture Masking

This entry will show how to apply texture masking using the compositer in Blender.

For the non-cycles approach, go here: Texture Stencil

This first texture will be the mask that we use.  I created this (crude) image using the following technique:  Texture Painting.  Other methods can be used, but essentially, the black or white will be used to allow or occlude the other texture.

In this example, the 'other texture' will be this galvanized metal downloaded from http://www.cgtextures.com/.

Once a new material is added to your object, go to the compositor and make the following arrangement.

The two textures are fed by the UV map (assumed is already generated example here).  These two feed into a Mix Node, which (this is the key) the mask image feeds into the FAC (or factor), while the metal texture feeds into the Color.  The other color in this case is set to white by default.  So the mask will allow white to pass through where the mask is white, and the metal texture where the mask is black.

A render of just the mask texture (as a plain texture, not a mask).

A render of just the metal texture.

A render of the metal being masked on the default white color.

Texture Painting

At times it is necessary to create your own custom textures (or texture masks), but creating these can be difficult if you can't paint on the object itself.  This can be done in Blender with texture painting.

This entry will show how to perform texture painting with the Cycles renderer, though it will be very similar for the internal renderer.

First we'll start with a bunker shaped rectangular prism.  We will be painting a camo texture onto it. 

Select the object and in Edit Mode [TAB], uv unwrap [u] it with Smart UV Project and switch to UV Edit View [Ctrl + LEFT].  You should see the following below.

Next we create a new image which we will paint on.  For this example, I made the background white.

The next image has a lot going on and is the main part of setting up Blender for texture painting.

First I created my own custom view which I called TexturePainting.  Note that the view consists, of the following views:

  • Node Editor
  • UV Image Editor
  • 3D View
  • Properties view.  

A new material needs to be created on the object with its Color set to Image Texture, and the new image that we created is selected.  The Vector needs to be set to UV.

The mode in the 3D View is set to Texture Paint.  This brings up the paint tool panel.  I selected airbrush as the Stroke.  To ensure the best viewing of the painting on the object, ensure the following:

  • Texture view is enabled
  • Zoom in close to the object while painting
  • Use orthographic mode rather than perspective

Finally I set the image in the UV Image Editor view also to the new image, so that I could see the effects of the painting on the map as I painted.

Now we begin painting!

Once the painting is complete, you can see the final painted object, and the painted uv map.

UV map projected on painted texture (i didn't paint the bottom).

For the new painting to show up in the render, you need to save the image.

Rendering applies that new painted texture to the object.

Friday, January 6, 2012

HDRI Image Lighting in Cycles

This entry essentially shows the steps of creating environmental lighting for a scene using an HDRI image.  This is the same concept as is introduced in this entry HDRI Lighting, however, you'll quickly note that this is much easier and simpler to do with the Cycles render engine.

So we start off with a simple scene with a smoothed sphere.

In the World tab, simple select Environment Texture for the Color, of the Background.  Select the desired HDRI image, and that's it.

Now that image will render as both lighting and the background for the scene.

HDR Sphere Image

There will be times when you want or need to use environmental lighting (rather than Blender light source), and therefore will need an HDR image.  Many scene type HDR images can be found online, but there may be times when you want an image of a specific scene.

Typically this would be achieved by taking a series of photos where the camera is rotated (ideally) around the the central node of the lens.  These images would be stitched together to create a 360 panorama.  This option isn't always available. 

Another simple approach that would give you a 180 degree solution is to use a mirror ball (or christmas ornament), and do some manipulation.  This entry will show how to convert a mirror ball image into a rectangular background which could be used in blender for lighting, such as Cylinder Lighting, or HDRI Lighting.

So first we start out with a mirror ball-like image.


The program of choice is to use HDR Shop, which can be found here: http://www.hdrshop.com/

Load the image in this program, and it should look something like below.

Next, open the Panoramic Transformations dialog.

Apply these changes and hit OK.

Next, open the same dialog, and now apply the following changes, and hit OK.

Now the image should be nicely unwrapped to a 180 degree pano of the scene.