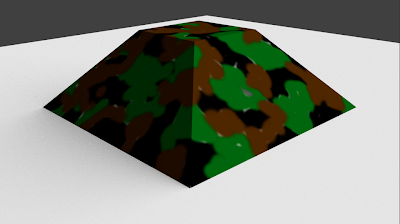
At times it is necessary to create your own custom textures (or texture masks), but creating these can be difficult if you can't paint on the object itself. This can be done in Blender with texture painting.
This entry will show how to perform texture painting with the Cycles renderer, though it will be very similar for the internal renderer.
First we'll start with a bunker shaped rectangular prism. We will be painting a camo texture onto it.
Select the object and in Edit Mode [TAB], uv unwrap [u] it with Smart UV Project and switch to UV Edit View [Ctrl + LEFT]. You should see the following below.
Next we create a new image which we will paint on. For this example, I made the background white.
The next image has a lot going on and is the main part of setting up Blender for texture painting.
First I created my own custom view which I called TexturePainting. Note that the view consists, of the following views:
- Node Editor
- UV Image Editor
- 3D View
- Properties view.
A new material needs to be created on the object with its Color set to Image Texture, and the new image that we created is selected. The Vector needs to be set to UV.
The mode in the 3D View is set to Texture Paint. This brings up the paint tool panel. I selected airbrush as the Stroke. To ensure the best viewing of the painting on the object, ensure the following:
- Texture view is enabled
- Zoom in close to the object while painting
- Use orthographic mode rather than perspective
Finally I set the image in the UV Image Editor view also to the new image, so that I could see the effects of the painting on the map as I painted.
Now we begin painting!
Once the painting is complete, you can see the final painted object, and the painted uv map.
UV map projected on painted texture (i didn't paint the bottom).
For the new painting to show up in the render, you need to save the image.
Rendering applies that new painted texture to the object.


No comments:
Post a Comment