This entry will be covering the concept of Normal Baking. This is very useful for adding very high detail to very simple geometry. This is very important for applications such as gaming where high detail, but low polygons are required. This example will take the simplest approach to Normal Baking, and that's simply adding texture to a plane.
So first off, the detail is created with an actual mesh. in this case, I created a simple raised edge surface, which is the same size as the regular plane below it.

The blank plane below is the target object which will receive the map baking. The normal map will need to be projected onto the UV map, so the receiving plane needs to be unwrapped [U].

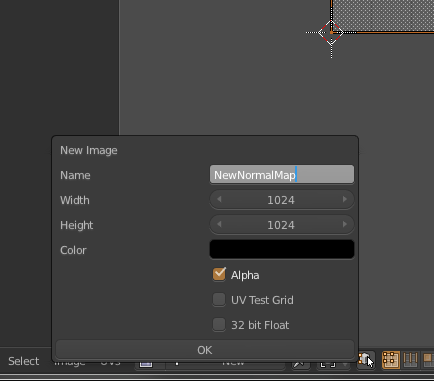
In the UV Editor View, create a new image and name it something appropriate relating to normal maps.
Next is baking, but before this is done. Back in the 3D View, make sure to select the detailed mesh and the blank receiving mesh, in that order. Then in the Render palette, set the following parameters in the Bake section. Note: The values defined here were specified in a CG Cookie Tutorial i saw.
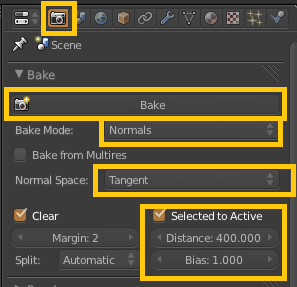
When you finally click Bake, back in the UV Edit View, you should now see the the normal map created as an image on the receiving plane. Save this image somewhere on your harddrive.

Next we'll apply that normal map to the receiving plane so that it is visible.
Follow the next sequence of parameter settings for the Texture of the plane, as would be standard applied.


Finally, to be able to see the texture in action in the 3D View, set the View Mode to Texture, and in the Properties Panel [N], set the following Shading settings.

Now in the 3D view, you should be able to see the new normal map in all its gory. It will update in real-time as you move and change the lighting of the scene. And as was originally stated, all this detail is simply a normal map on a single plane (quad).


No comments:
Post a Comment