This entry will show how to apply texture masking using the compositer in Blender.
For the non-cycles approach, go here: Texture Stencil
This first texture will be the mask that we use. I created this (crude) image using the following technique: Texture Painting. Other methods can be used, but essentially, the black or white will be used to allow or occlude the other texture.

In this example, the 'other texture' will be this galvanized metal downloaded from http://www.cgtextures.com/.

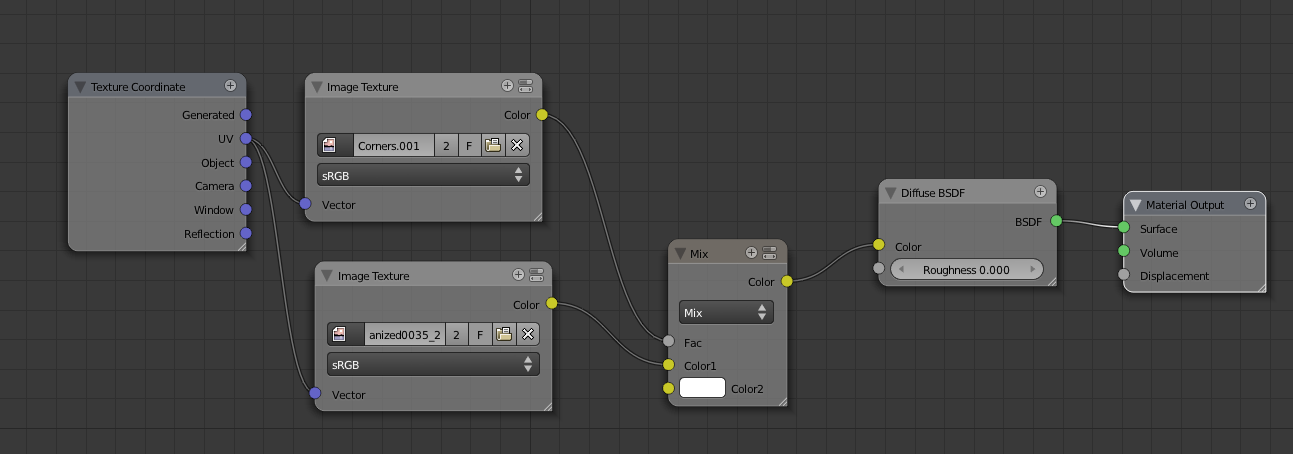
Once a new material is added to your object, go to the compositor and make the following arrangement.
The two textures are fed by the UV map (assumed is already generated example here). These two feed into a Mix Node, which (this is the key) the mask image feeds into the FAC (or factor), while the metal texture feeds into the Color. The other color in this case is set to white by default. So the mask will allow white to pass through where the mask is white, and the metal texture where the mask is black.
A render of just the mask texture (as a plain texture, not a mask).

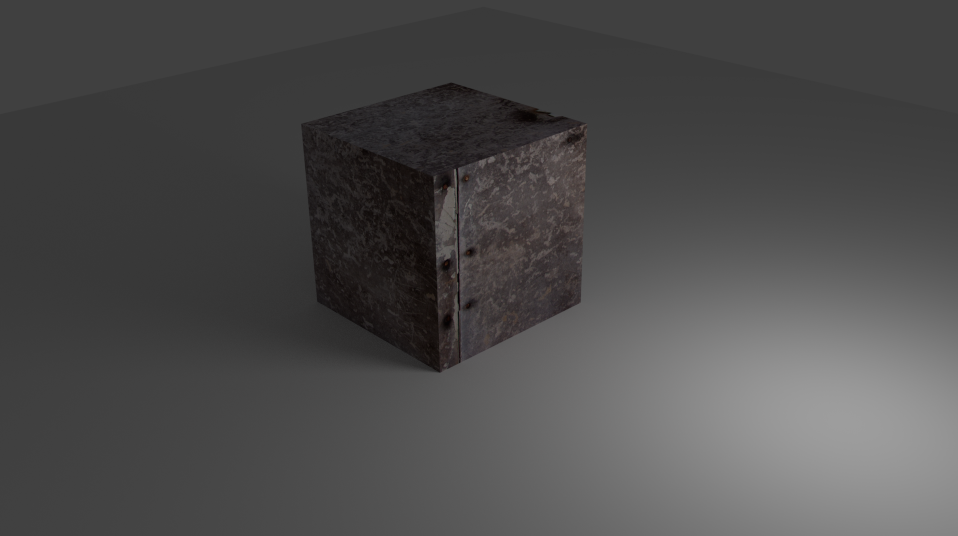
A render of just the metal texture.

No comments:
Post a Comment