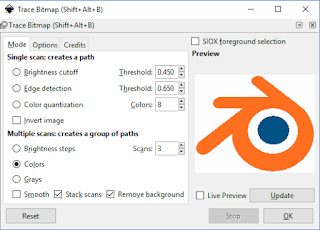
The basic process is in converting the original image into an SVG and importing that SVG into Blender and then extruding that object. We will use Inkscape to convert a PNG into an SVG.
To do this, first open the image into Inkscape.
Once the image is open, click on it to select it.
Next click the option Path > Trace Bitmap.
The following dialog will appear. Adjust the settings accordingly as shown below, setting the scans to 1+ the number of unique colors in the image.
Once you have done this, click Update to see the example trace in the Preview window. Once you are happy with how it looks, click the OK button. Nothing will visibly happen here, so close the dialog box.
Back on the image click the logo and drag it to the side. You'll notice there are now two. The top one you dragged will be your new vector object, and the bottom one is your original image.
Delete the original image.
Now you can re-center your vector image and save it as an SVG file.
Now in Blender, you can import the SVG with File > Import > SVG.
The object may appear small, and not it is an object drawn as a collection of Curves. In my case I want to extrude it into a volume, so first I converted it to a mesh with the [Alt + C] command, selecting Mesh from Curve.
At this stage I can now extrude the mesh into the z-axis, ready for a nice 3D print.


No comments:
Post a Comment