Sunday, October 6, 2013

Ceramic in Cycles

A quick entry on how to create a simple ceramic material like the one shown below.


Node setup is a simple combination of a Diffuse and Glossy, with the Mix Shader Fac biased toward the Diffuse.  The effect looks most convincing when there is a distinct light source, as opposed to the scene being lit by a texture.

Note also that the Roughness of the Glossy is set to zero.

Saturday, September 14, 2013

Invisible Emissive Material

In the Cycles renderer, let's assume that you want to light your scene with an emissive mesh, however, that mesh is in the way of how you want to view the scene.  Hiding the mesh will also remove the light effect, so we need to make the object invisible to the camera, but still light the scene.

With the emissive object selected, in the Object panel, under Ray Visibility, uncheck the Camera box.

Saturday, June 22, 2013

Ivy Generator

This entry is an introduction to the Ivy Generator addon.  This addon is now built into the latest version (at least versions later than 2.66a).  To demonstrate this function we'll be adding the ivy vines to this marble platform of suzanne.


Thursday, June 13, 2013

Retargeting BVH

This entry covers another method for incorporating Motion Capture data through a BVH file.  This method is useful for any circumstance, but is exclusively helpful when your BVH rig does not have a nice T-Pose in Edit Mode (as shown below).


This entry is a very basic summary of what is shown in this video here Video Reference

A huge database of BVH files can be found here:  MoCap Database

If you have a BVH rig with a nice T-Pose while in Edit Mode, you may want to use this approach instead  BVH Meshing


Mesh a BVH Armature

This entry will show a simple approach to meshing a motion capture armature.  This method lends itself well to an armature that has a nice T-Pose while in Edit Mode.

For this approach, we'll be adding our own mesh to the existing mocap armature.  Since the requirement is have a nice T-Pose in Edit Mode, I found that BVH files at this site T-Posed Mo Cap Links, meet that requirement.

Below is an image of an example armature in edit mode.

Saturday, June 8, 2013

Object Display Attributes

This entry will overview the different Display properties in the Object panel.  Many of these are best understood through experimentation, but some are easier to understand with description.


Saturday, April 27, 2013

Loading Video

This entry covers loading video into the Video Editor in Blender.  This operation can be quite simple, but there is a catch if your video was not rendered at 24fps.

The first image is the Video Editing View, which is where all the video editing work will be done.

Friday, April 26, 2013

Animate Object Visibility

There is a very simple way to key frame visibility of an object.  In the Outliner window, a keyframe can be set on the scene visibility or the render visibility simply by [Right-Clicking] on either the Eye icon, or the Camera icon.  


Friday, April 19, 2013

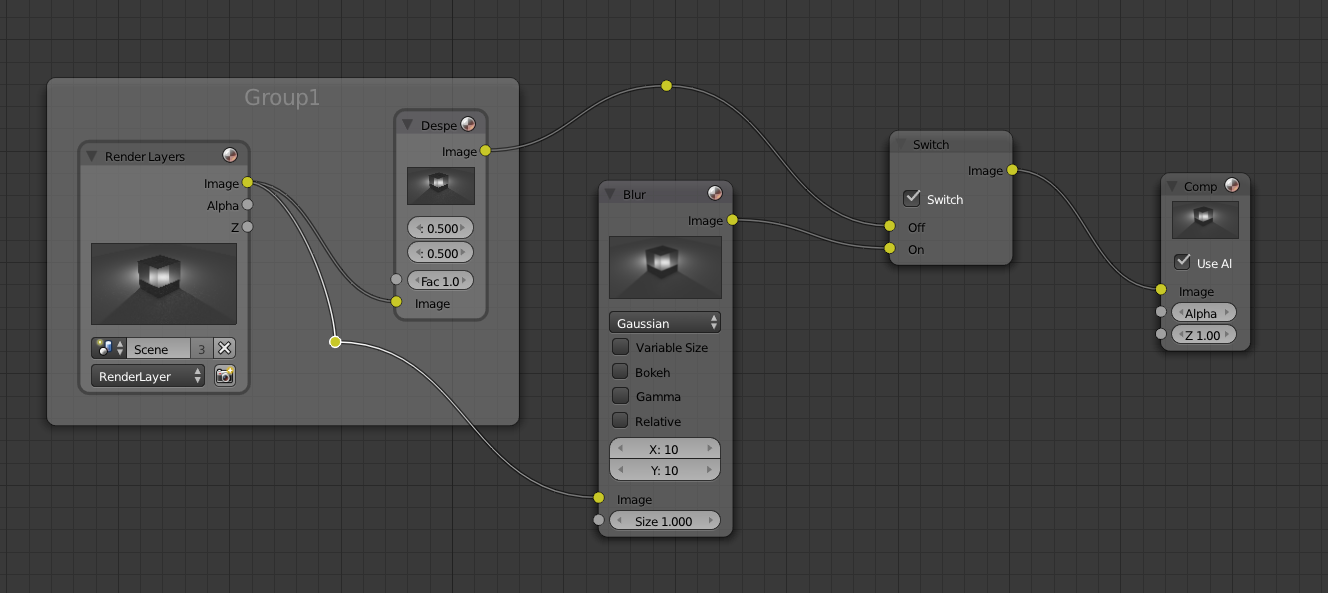
Compositor Node Layout

This entry will cover the group of Compositor features that fall under the Layout category.  These features help to organize your node setup and help you iterate through your design.


Node Operations

This entry covers a varied set of operations that can be performed in the Compositor View.

First, the very simple but useful feature of muting nodes.  This can be done by selecting a node in the compositor and pressing [M].  When a node is muted, the header turns red, and an visual bypass line is shown in red behind the node.

This is a toggle operation, so pressing [M] again will un-mute it.

This is very useful to try to review effect the node has on the render.

Friday, April 12, 2013

Retopology

There are many situations where it may be advantageous to redo the toplogy of an existing model.  Perhaps you got it from a CAD software which doesn't care about topology.  Or perhaps you are remodeling something for animation.  Whatever the case, it may be best to just remodel with conventional methods (box modeling).  In other cases, it may be best to enable snapping to the mesh's face-normals as a guide. 

This entry will summarize the method that can be used to perform a retopology of an existing mesh.  In my opinion, this is best suited for complex organic shapes. 

For this example, we'll start with a Make Human head.  Note that the make-human head does has a perfectly good topology, this is just for example.

Thursday, April 11, 2013

Snap To Modeling

This quick tutorial covers the concept of modeling via snapping to a reference.  This is very useful if you need to line up vertices or edges, or if you need to extrude something with respect to another part of the mesh.

The snap menu can be found near the layers selection area at the bottom of the viewport.  By default it is set to snap to the Grid.  This standard behavior can be noted when try to move [G] something, that by holding the [Ctrl] button, the movement will be constrained to the visible grid.

When this is changed to say Vertex, the snapping will now be based on the nearest vertex to your current cursor position.

Friday, March 22, 2013

Multi-View Render

Suppose that you desire to render two scenes into a single image (render).  This normally can be done in photoshop, or if it's a video, a video compositor.  However, if for some reason you want to do it all in Blender, it can be done.

For this entry we'll explore how to take the two following scenes:


...and render them into a single image side by side.  This approach can be used for stereoscopic rendering, or to do a dual view render, or just to combine two different scenes in a juxtaposed fashion.

Monday, March 11, 2013

Cell Fracture

This entry will cover the basics of animating the fracture of an object.  This entry is based mostly on information from the following video:  Blender Cookie Tutorial

The first step is to find and enable the Cell Fracture add-on in the User Preferences.